FEZ ULTIKIT - [FEZ Accu Test]
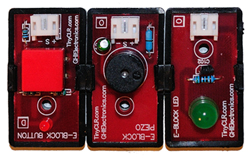
I chose to build a FEZ application without an LCD module: I only used a green LED, a buzzer and a button. The output with results is written to a microSD card (the Fez Panda II has a microSD card reader).
Once the FEZ is powered up the FEZ will start looking for the SD card. If no SD card is found the buzzer starts sounding continuously. This indicated an error: you need to insert a (formatted) µSD card and press the RESET button of the FEZ. It will be booted again ...
If an µSD card is found after powering up the green LED will start flashing rapidly. This means the FEZ is ready to perform a test. You now have to insert 4 fully charged batteries into your battery holders. Once this is done you can push the START button.
Now a complete discharging test will occur. It will take approximately 8 hours to complete. During this time the LED will flicker. The frequency of the flickering will increase as the end of the test is nearing. Once the test is completed the buzzer will start sounding a few times. This means the µSD card has been written and can be ejected to analyze the data on a computer.
If you want to rebuild this project with a FEZ you will have to use these connections:
Here you can download a preliminary beta version of my software to control the accu tester. You need to open the project with Visual C# and send it to your FEZ Panda board. The logger and control code is working, but there are still some problems with the SD card mounting code.
![]()
![]()
Copyright ©1998-2022 Vanderhaegen Bart - last modified: August 24, 2013
